
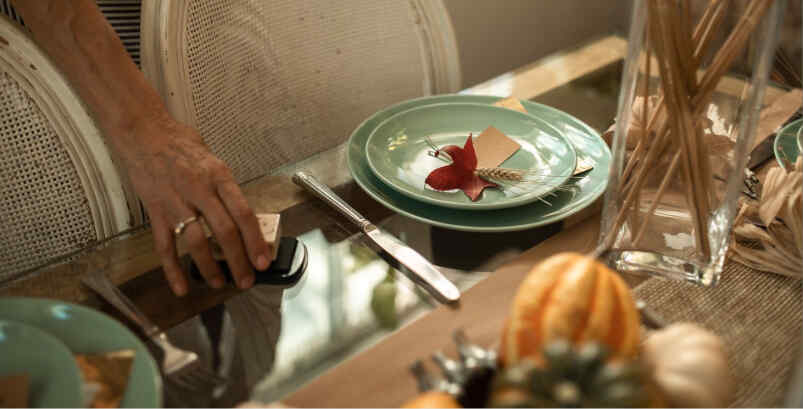
Thanksgiving is just around the corner, and is your table still empty? The good news is that the most beautiful Thanksgiving decorations can be made with just pumpkins and leaves.
With supplies from the grocery store and an hour of work, your arrangement will be ready before the turkey arrives. Best of all, you don’t need any experience or special tools.
Below, we’ll share a simple guide to choosing pumpkins, combining leaves, and arranging each piece while leaving enough room for plates and serving dishes.
We’ll also show you the most common mistakes to avoid if you want to welcome your guests with a warm, colorful table filled with the scents of fall. Ready?
Table of contents
Materials for a Pumpkin and Fall Leaf Centerpiece
Before putting your arrangement together, make sure you gather all your materials in one place. This will help you work faster and check from the start whether anything is missing.
Pumpkins are the main feature, and fortunately, they’re plentiful this time of year. According to the U.S. Department of Agriculture, the country produced approximately 1.44 billion pounds of pumpkins in 2024.
Which Pumpkins Should You Choose for Your Centerpiece?
Decorative pumpkins are easy to find in the fall. According to the USDA, more than 15,000 farms across all 50 states grew pumpkins for fresh sales and decoration in 2022.
As a result, you’ll find a wide variety of sizes, shapes, and colors. For a balanced arrangement, place a medium-sized pumpkin in the center and surround it with several smaller ones.
White pumpkins also break up the dominance of orange, while those with textured skin add visual interest. However, always choose firm pumpkins without soft spots and with dry stems.
Natural or Artificial Fall Leaves
Leaves bring in the reds, yellows, and browns that complete the fall color palette. If you have trees nearby, collect dry, clean leaves without holes to use in your decoration.
Next, place them between two sheets of paper and set a few books on top overnight. This will flatten them, making it easier to arrange them among the other elements.
Don’t have trees that change color in your area? Don’t worry. In that case, use fabric leaves instead. Here’s a tip: combine natural and artificial leaves to make the arrangement look fuller.
Base, Candles, and Seasonal Accents
Your Thanksgiving centerpiece also needs a base to keep everything organized. A table runner or wooden board defines the space and protects your tablecloth.
On the other hand, decorative accents add height, shine, and fragrance. However, choose just a few and repeat them throughout the arrangement. Here are some elements that work particularly well for the occasion:
- Candles in glass holders: Provide warm lighting and keep the flame away from the leaves.
- Rosemary or eucalyptus sprigs: Fill empty spaces and add a pleasant fragrance.
- Pinecones, walnuts, and pomegranates: Add texture and echo the colors of the season.
- Dried corn cobs: Evoke the harvest and introduce yellow and purple tones.
How to Make a Thanksgiving Centerpiece Step by Step
With all your Thanksgiving decoration materials ready, assembling the centerpiece will be quick and easy. Work directly on the table so you can better estimate the available space. Then follow these steps.
Prepare the Base and Measure the Available Space
First, spread out the table runner or place the wooden board in the center. Next, sit in one of the chairs and check how much space remains on each side.
Remember that plates, glasses, and serving dishes also need room. As an additional guideline, leave at least one plate’s width of free space on either side of the arrangement.
This way, your pumpkin centerpiece will occupy the middle of the table while leaving enough room for your guests. If you have a round table, create a small circular arrangement instead of a long line.
Arrange the Pumpkins from Largest to Smallest
Next, place the largest pumpkin in the center of the table runner. This piece will serve as your starting point and help determine the height of the entire decoration.
Then, distribute the medium-sized and small pumpkins toward the ends, alternating colors to prevent any one shade from becoming too concentrated in a single area. Ideally, arrange them in groups of three or five.
Groups look more natural than pairs. To keep the pumpkins from moving during dinner, check the following details before adding the leaves:
- Stable base: Turn each pumpkin until you find the side that rests securely without wobbling.
- Support for round pumpkins: Attach a small piece of double-sided tape underneath any pumpkin that rolls.
- Spaces between groups: Leave small gaps for the leaves and candles.
Add the Leaves, Candles, and Finishing Touches
Now it’s time to fill the gaps with fall leaves. Tuck them underneath the pumpkins so the arrangement looks as though it’s resting on a bed of foliage.
Also, let a few loose leaves extend toward the edges of the table runner to make the arrangement look less rigid. Finally, place the candles in the remaining spaces.
To finish, add a few aromatic sprigs. For example, Abasto notes that rosemary is one of the ingredients that adds fall flavor to your dishes while bringing a pleasant fragrance to the surroundings.
Thanksgiving Decoration Ideas to Match Your Home’s Style
Once you’ve mastered the basic arrangement, you can change its style with just a few adjustments. Simply modify the colors, materials, or types of pumpkins you use. Let’s look at three different options!
Rustic Style with Wood and Earth Tones
Rustic style evokes the charm of a country home. To achieve this look, use a wooden board as your base and choose orange pumpkins with slightly rough skin and a few natural markings.
Next, add brown dried leaves and white candles inside glass jars. This combination keeps things simple while allowing the other elements to stand out.
Elegant Style with White, Gold, and Green
If you’re looking for something more formal, use white and light green pumpkins as part of your Thanksgiving decorations. Paint their stems gold and complement them with eucalyptus branches.
The result combines soft colors with a subtle shine that stands out in candlelight. For this style, replace the glass jars with tall, slender candlesticks.
Budget-Friendly Version Using Grocery Store Items
You don’t need to spend much to create a beautiful Thanksgiving table. The produce section of your local grocery store offers affordable zucchini, red apples, pears, and walnuts.
These items can decorate your table during dinner and then become part of your meals the next day. For example, you can use a sweet pumpkin to prepare Abasto’s delicious pumpkin flan recipe.
Mistakes That Ruin a Centerpiece and How to Avoid Them
Have you already put your arrangement together, but aren’t happy with the result? Don’t worry. A few small changes can make all the difference. Just pay attention to height, freshness, materials, and safety.
An Arrangement That’s Too Tall and Blocks Conversation
A common mistake is creating a pumpkin centerpiece that prevents guests from seeing the people sitting across from them. This forces everyone to lean to the side to hold a conversation.
That’s why height deserves special attention. To check it, sit down and look across the table, just as your guests will during dinner.
If the arrangement blocks the face of the person opposite you, remove the tallest piece or replace it with a shorter one. In this case, tall, slender candles work well.
Pumpkins and Leaves That Deteriorate Before Dinner
Another common problem occurs when the Thanksgiving centerpiece is assembled too many days in advance. Whole pumpkins last for several weeks when stored in a cool, dry place.
However, natural leaves dry out, curl, and break quickly indoors, especially in a heated home. For this reason, it’s best to add them near the end of the assembly process.
The good news is that a few simple habits will help keep everything in good condition until dinner. Follow these tips as soon as you bring the materials home and throughout the days leading up to the celebration:
- Clean beforehand: Wipe the pumpkins with a damp cloth and dry them thoroughly before arranging them.
- Add leaves at the end: If you’re using natural leaves, add them one or two days before the event.
- Keep away from heat: Position the arrangement away from heating vents, stoves, and direct sunlight.
- Inspect daily: Remove any pumpkins with soft spots to prevent them from affecting the others.
Unprotected Candles Near Dry Leaves
Dry leaves and open candle flames are a dangerous combination. A simple draft or an accidental brush of the arm is enough to set a leaf on fire.
Therefore, never allow a lit candle to come into contact with the arrangement. To enjoy the warm glow without the risk, use candles inside glass holders or lanterns that enclose the flame.
Another excellent option for Thanksgiving decorations is LED candles. They run on batteries and don’t produce heat, making them ideal for homes with young children or pets.
Your Thanksgiving Decorations, Ready for Dinner
With pumpkins, leaves, and a few candles, your table will be ready to welcome family and friends. Best of all, these Thanksgiving decorations can be adapted to your style and budget.
With the centerpiece taken care of, you can focus on the main course. To impress your guests, check out Abasto’s secret to making a spectacular Thanksgiving turkey.